How to Set Up Contact Form 7
Introduction: Contact Form 7 is a popular WordPress plugin that allows you to easily create and manage contact forms on your website. In this article, we will guide you through the process of setting up Contact Form 7 step-by-step, so you can start receiving inquiries and messages from your visitors. Let's get started!
Prerequisites: Before setting up Contact Form 7, you need to have the following:
- A self-hosted WordPress website.
- Administrator access to your WordPress dashboard.
- Basic knowledge of WordPress and its plugin installation process.
Step 1: Install the Contact Form 7 Plugin
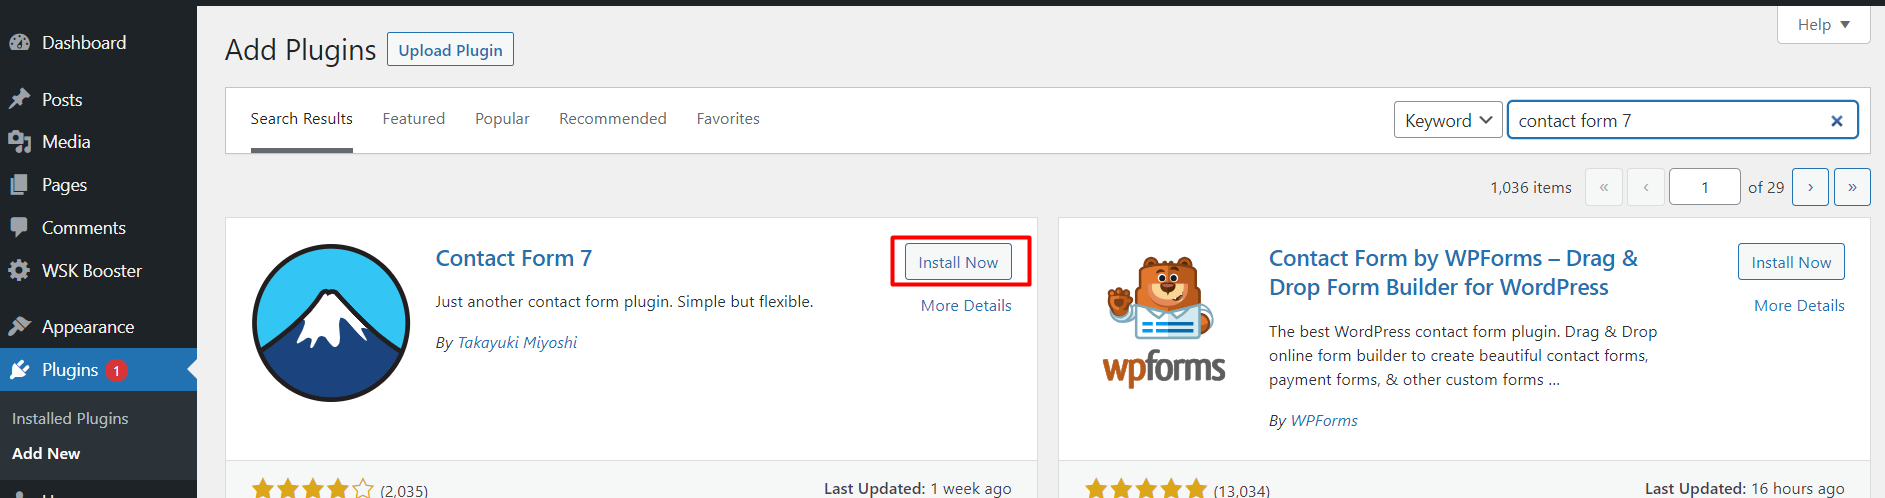
- Log in to your WordPress dashboard.
- Navigate to "Plugins" on the left-hand side menu.
- Click on "Add New."
- In the search box, type "Contact Form 7."
- Locate the Contact Form 7 plugin and click on "Install Now."
Step 2: Activate the Plugin
After installing the plugin, you need to activate it. To activate, click on the Activate button, and the plugin will be activated in a few seconds.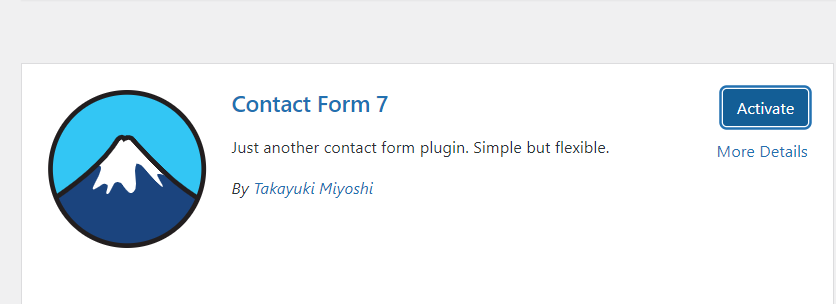
For more help installing plugins with this method, here's a video tutorial
How to Install a Plugin in WordPress
Step 3: Create a new Contact Form
- After activating the plugin, you will see a new option called "Contact" in your WordPress dashboard menu.
- Click on "Contact" and then select "Add New."
- Provide a name for your form (e.g., "General Inquiry").
- Once you have entered the name of your contact form, click on the “Save”.

Step 4: Add Contact Form Fields
After creating a new contact form, you can add fields such as text, email, phone number, etc. To add fields to your contact form, you can copy and paste the shortcodes available on the right-hand side of the form editing page.
You can customize the fields according to your requirements by editing the code. Once you have added all the necessary fields, click the Save button
The most important Contact Form 7 settings you need to define are located in the Mail tab: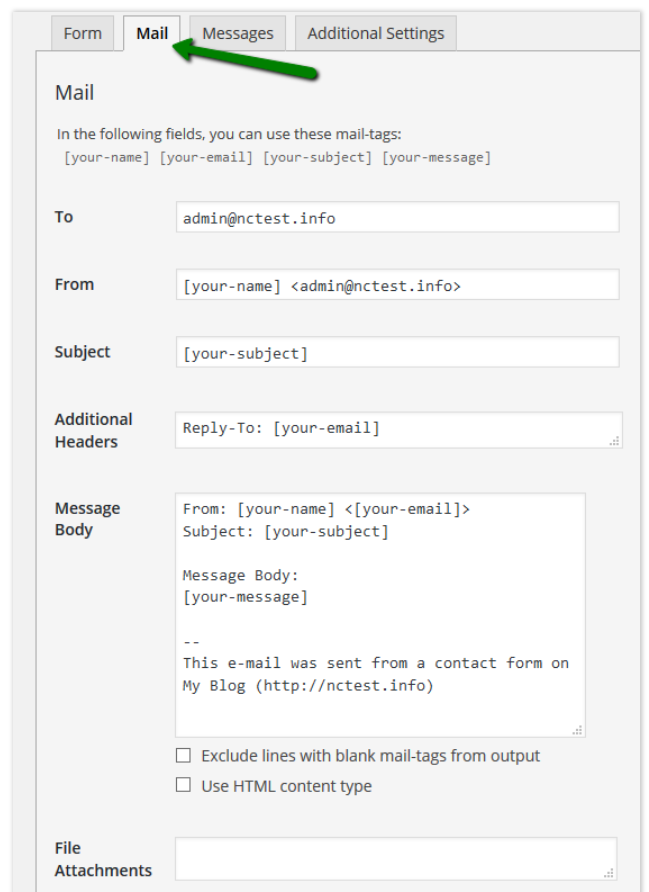
Let's review each and every conditional field.
To: All submitted forms will be sent to the email address specified here. You can use any valid existing email address you want.
From: The server will be using this email address to send you contact form emails. It should be a valid existing email address.
- If the mail service for your domain is configured to be a cPanel one, no additional steps are required.
- If your domain is using Private Email, GoogleApps or any other third-party mail service, you will also need to switch from WP mail() function to SMTP sending method by additionally installing and configuring one of SMTP plugins
NOTE: Due to the aforementioned restriction, it is not possible to use [your-email] mail tag in the FROM field on our shared servers.
Subject: In this field, you can specify the subject of the contact form email. If not filled out, the subject submitted by the visitor is used.
Additional headers: Here you can specify any additional email headers which will be added to the contact form email. For example, the Reply-To field added by default allows you to respond at the visitor's email address by pressing the Reply button.
File attachments: You can enable attachments for your contact form so that the visitor can send you files in the submitted email.
You can find more information about the contact form usage in the Contact Form 7official documentation. There you will find details related to enabling reCAPTCHA, using placeholders, attachments, autoresponders, and more.
Step 5: Add the Contact Form to a Page or Post
- Create a new page or edit an existing one where you want to display the contact form.
- In the page editor, click on the "Add Form" button.
- A Contact Form 7 tag generator popup will appear.
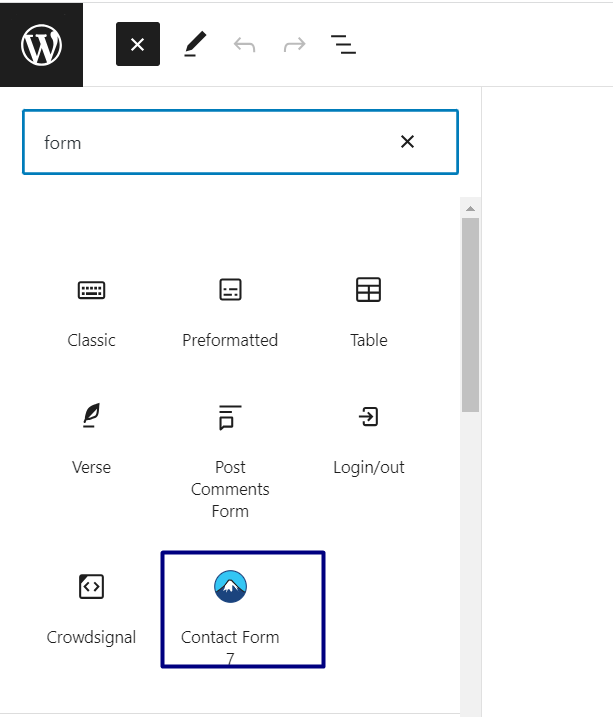
- Choose the form you created from the dropdown menu.
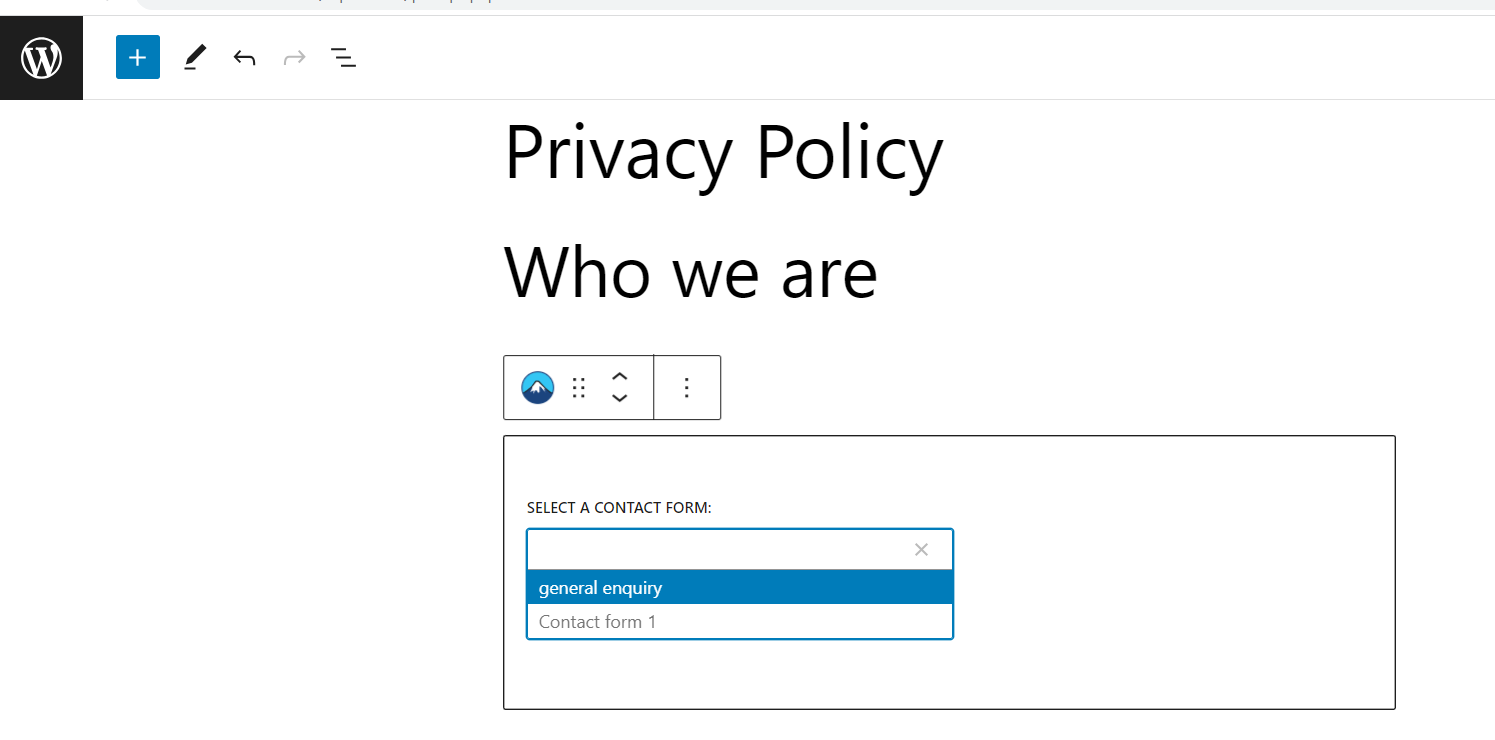
- Customize the appearance and settings if needed.
- Click on the "Insert Tag" button.
- The contact form shortcode will be inserted into your page or post.
Step 5: Test Your Contact Form
- Visit the page or post where you added the contact form.
- Fill in the form fields and submit the form.
- Check your email inbox associated with the "To" address you configured.
- Verify that you have received the test message with the form submission details.
Conclusion: Congratulations! You have successfully set up Contact Form 7 on your WordPress website. Now you can easily create customized contact forms to engage with your visitors and receive their inquiries. Feel free to explore additional features and settings offered by Contact Form 7 to enhance the functionality of your forms.


