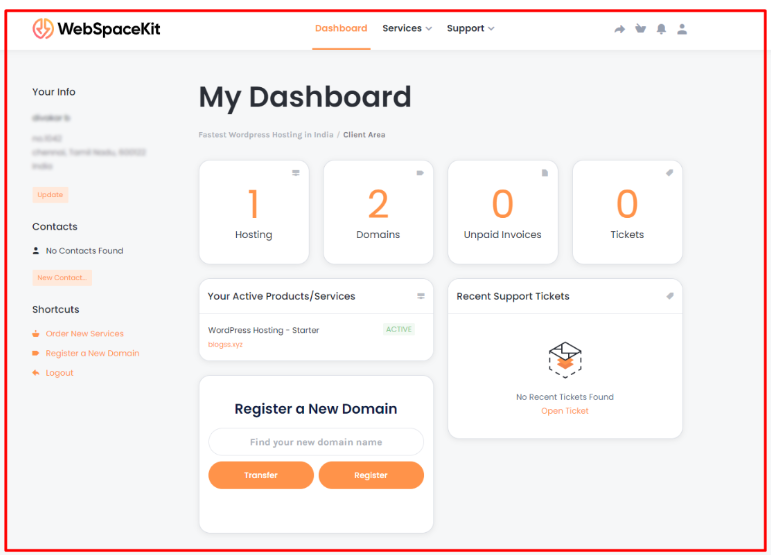
Step 1: Login to your WebSpaceKit dashboard
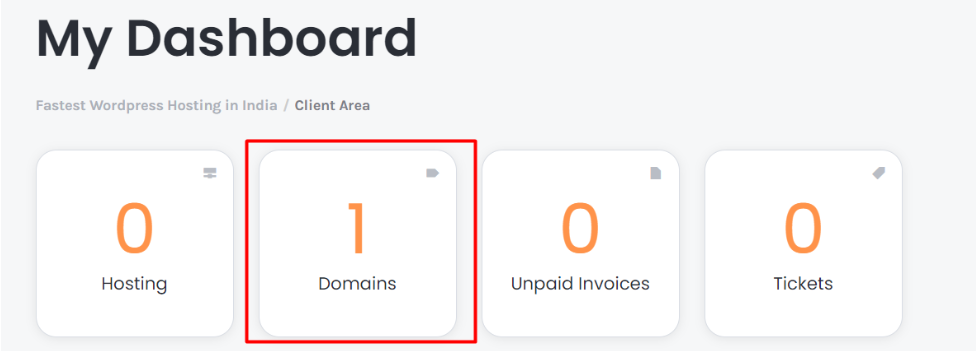
Step 2: Click ‘Domain’ in your WebSpaceKit dashboard
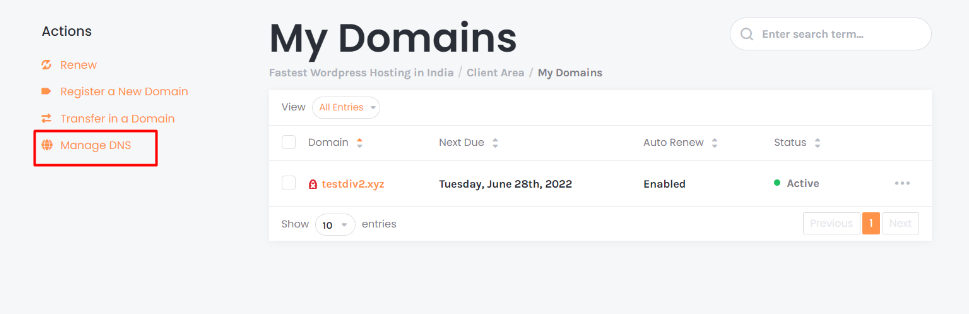
Step 3: Now on the left hand side, click ‘Manage DNS’ under Actions tab And it will take you to the DNS zone
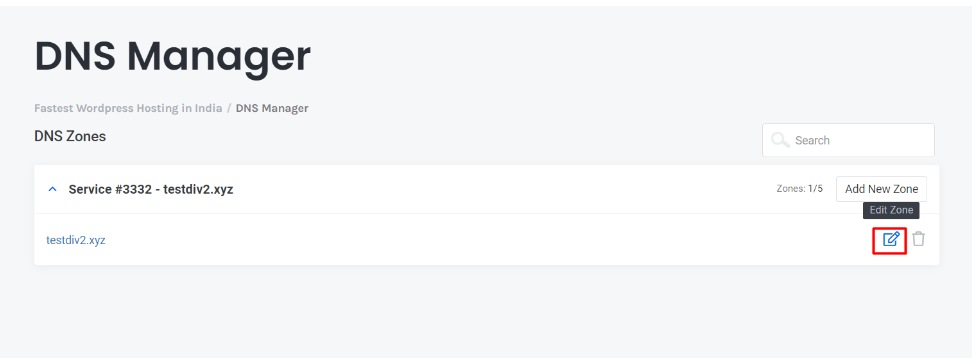
Step 4: Here click ‘edit DNS zone’
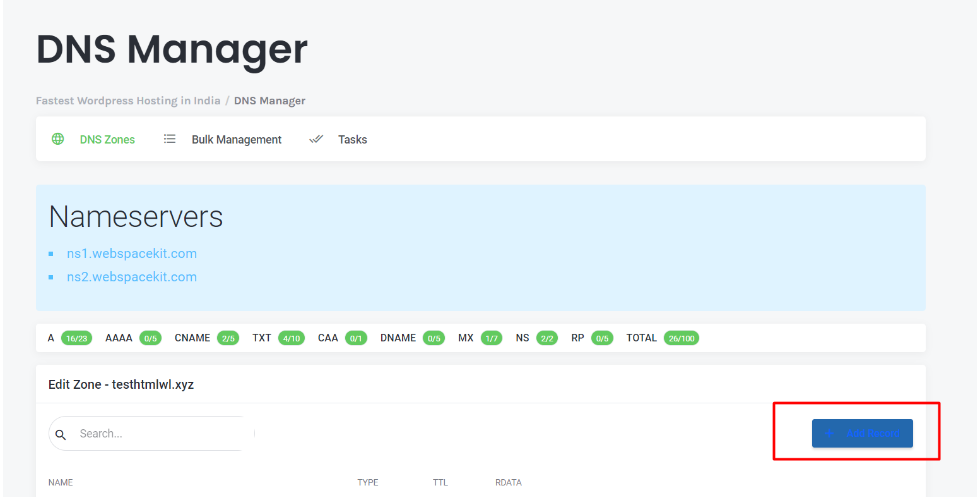
Now to add the CNAME Record
Step 5: Click ‘Add Record’
Step 6: Select CNAME in the drop-down menu
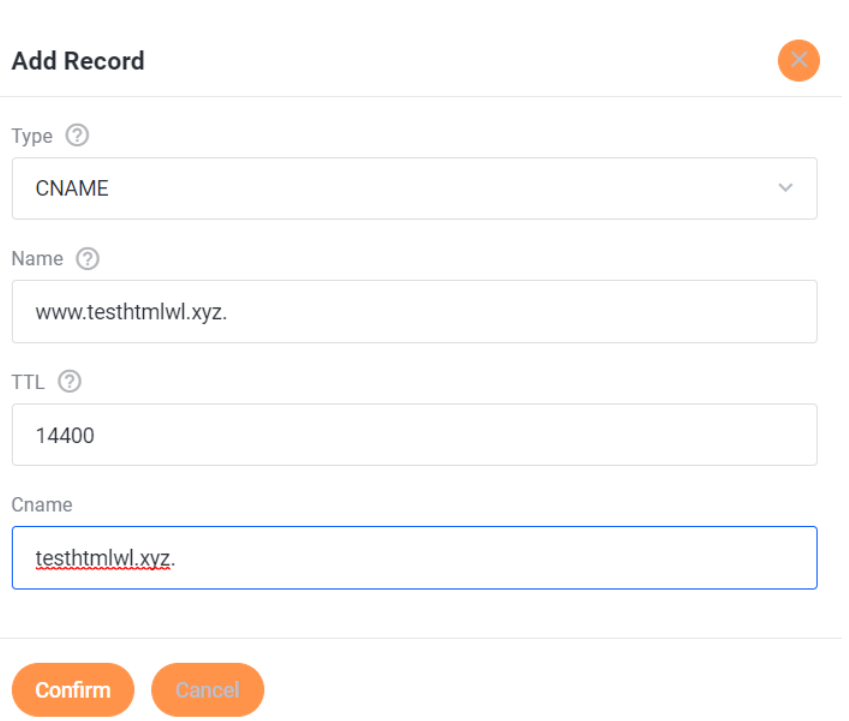
Here you can add your desired CNAME record, & Click Confirm to add your CNAME.


