To host an additional domain on your WebSpaceKit hosting account. First Purchase the domain name from your WebSpaceKit account, follow the instructions in the below link - https://webspacekit.com/client/knowledgebase/6/How-to-buy-a-new-domain-within-the-client-area-For-existing-client.html
Please Note: Before adding the domain you need to point the domain to our server either by updating our WebSpaceKit Nameservers or A & WWW records.
How to add multiple WordPress Websites to WebSpaceKit
Step 1: Login in to your WebSpaceKit Dashboard
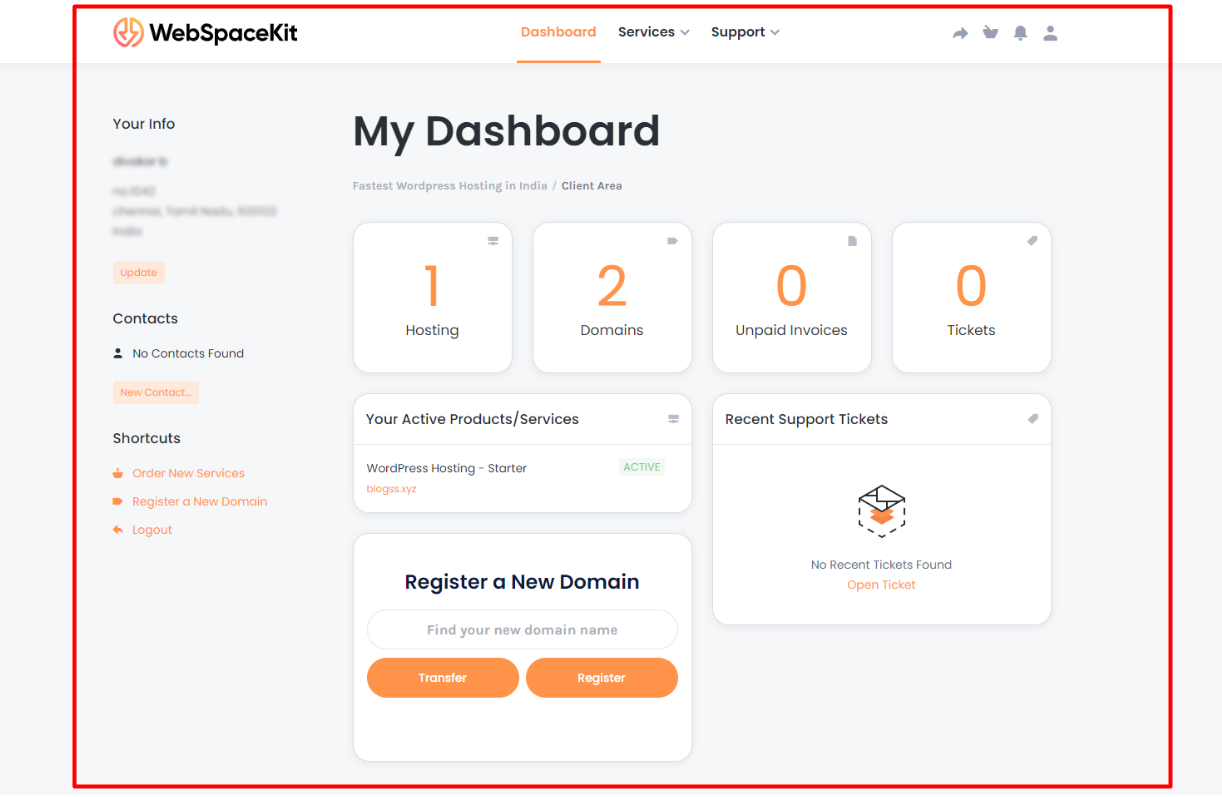
Step 2: Click Hosting in your WebSpaceKit Dashboard
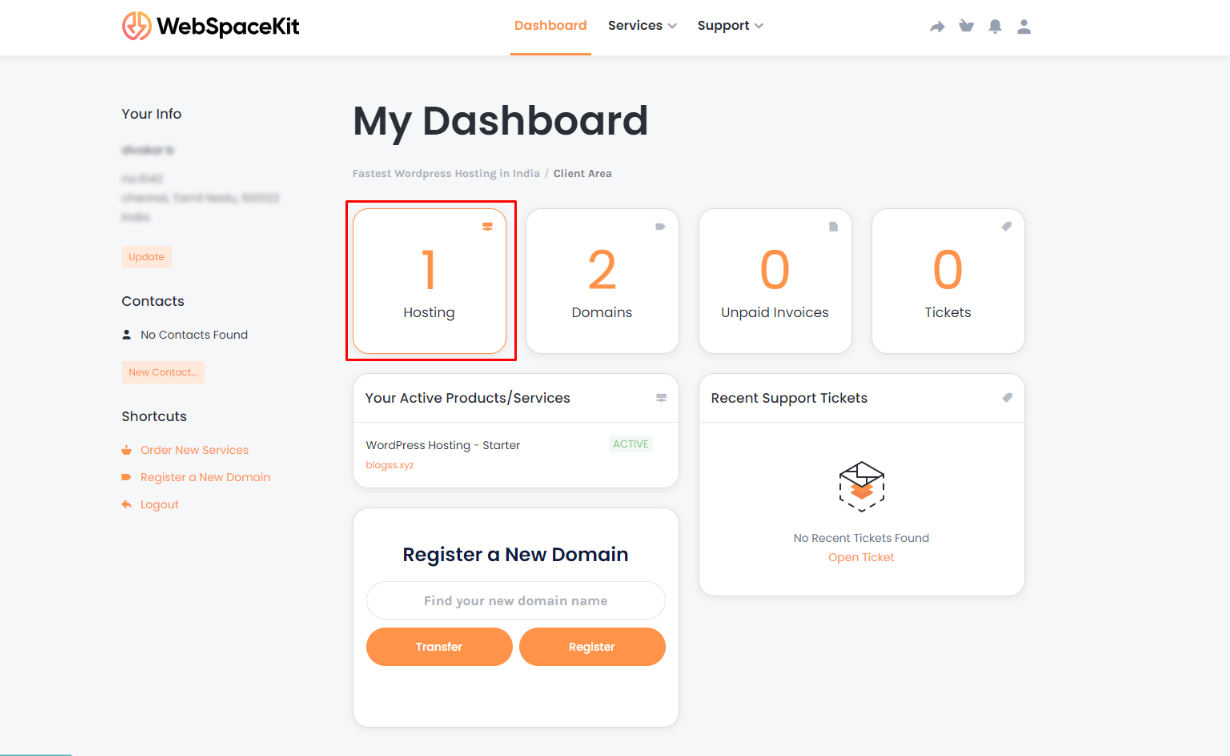
Step 3: Click the Hosting Plan to Manage all your hosting features.

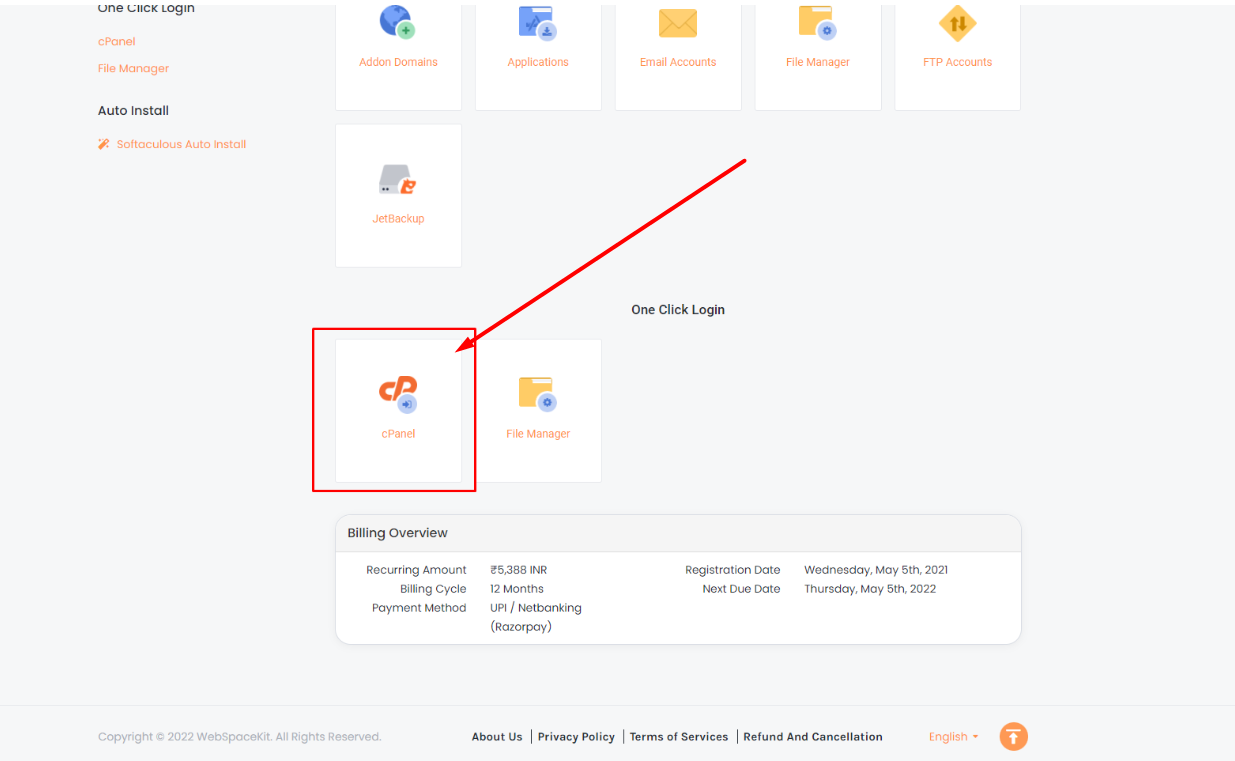
Step 4: Hosting Manager Page will open, scroll down to click cPanel to log in to your cPanel Dashboard.
Step 5: Cpanel Dashboard will open, scroll down to find Domains.
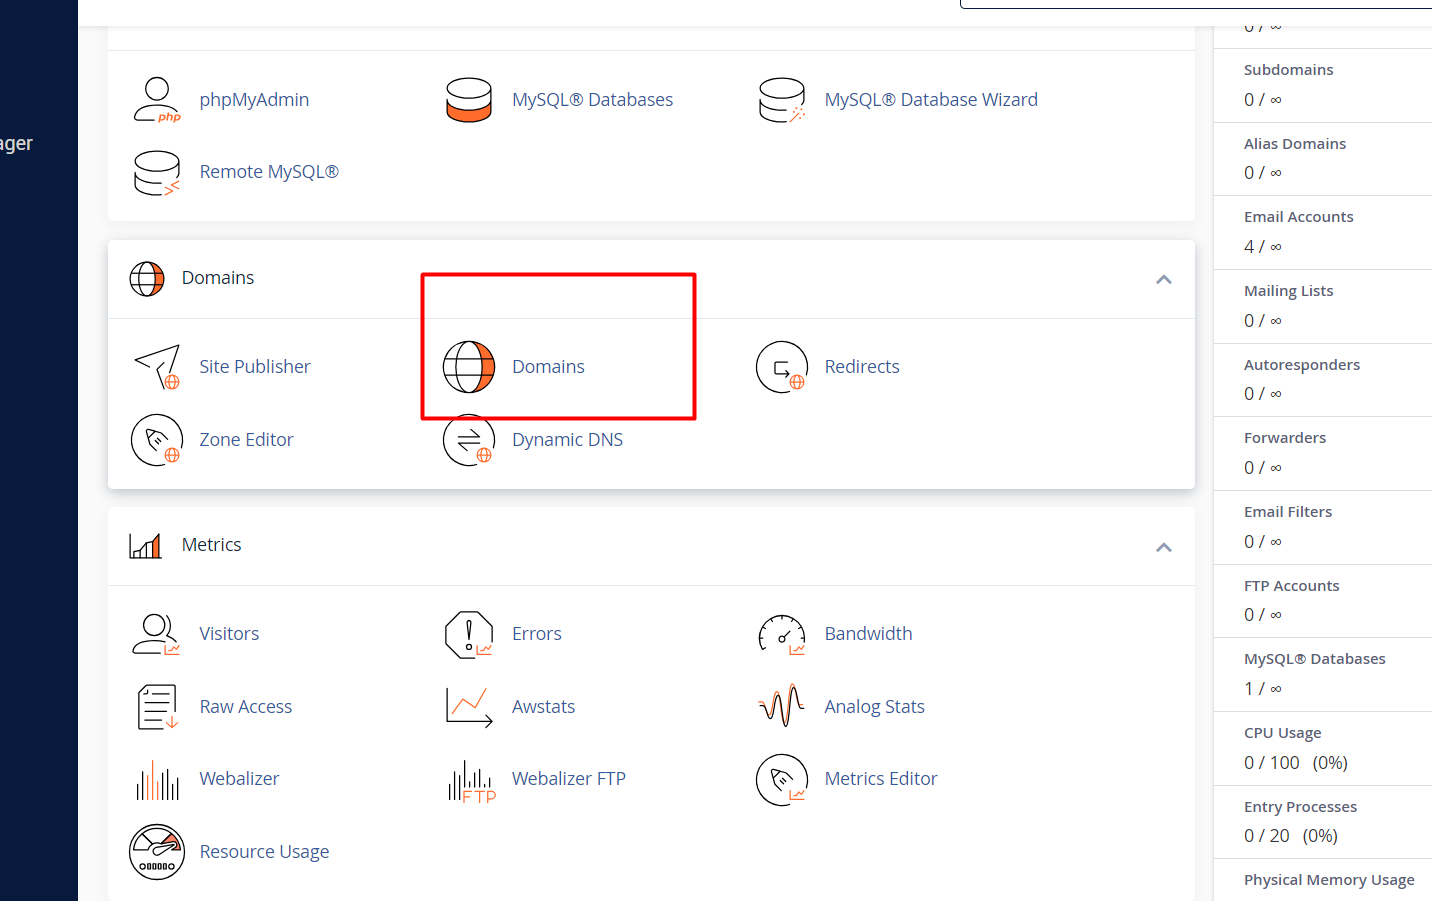
The domain page will open
Click create a new domain

Step 6: Enter the additional domain which you have purchased. Enter the domain name in the New Domain Name section, Subdomain, and Document root will be auto-filled Click Add Domain to add Domain.
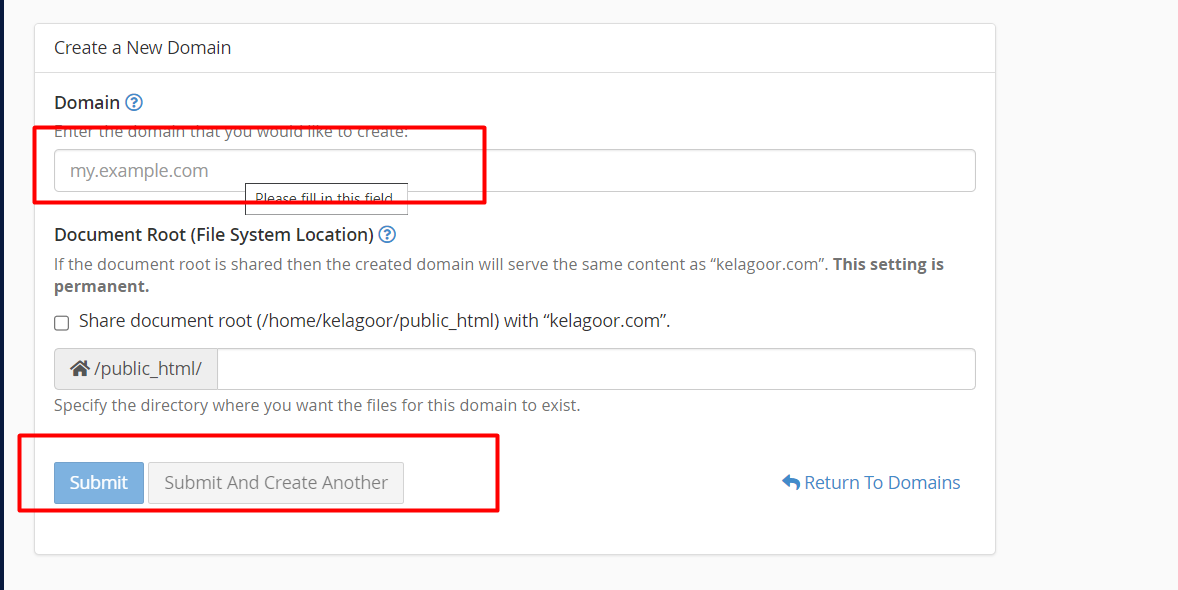
Upon clicking the Add Domain button, a new domain will be created.
Now let’s go to the next step, which is to install WordPress on the added domain.
Step 1: Cpanel Dashboard will open, scroll down to find Softaculous App Installer or WordPress Manager

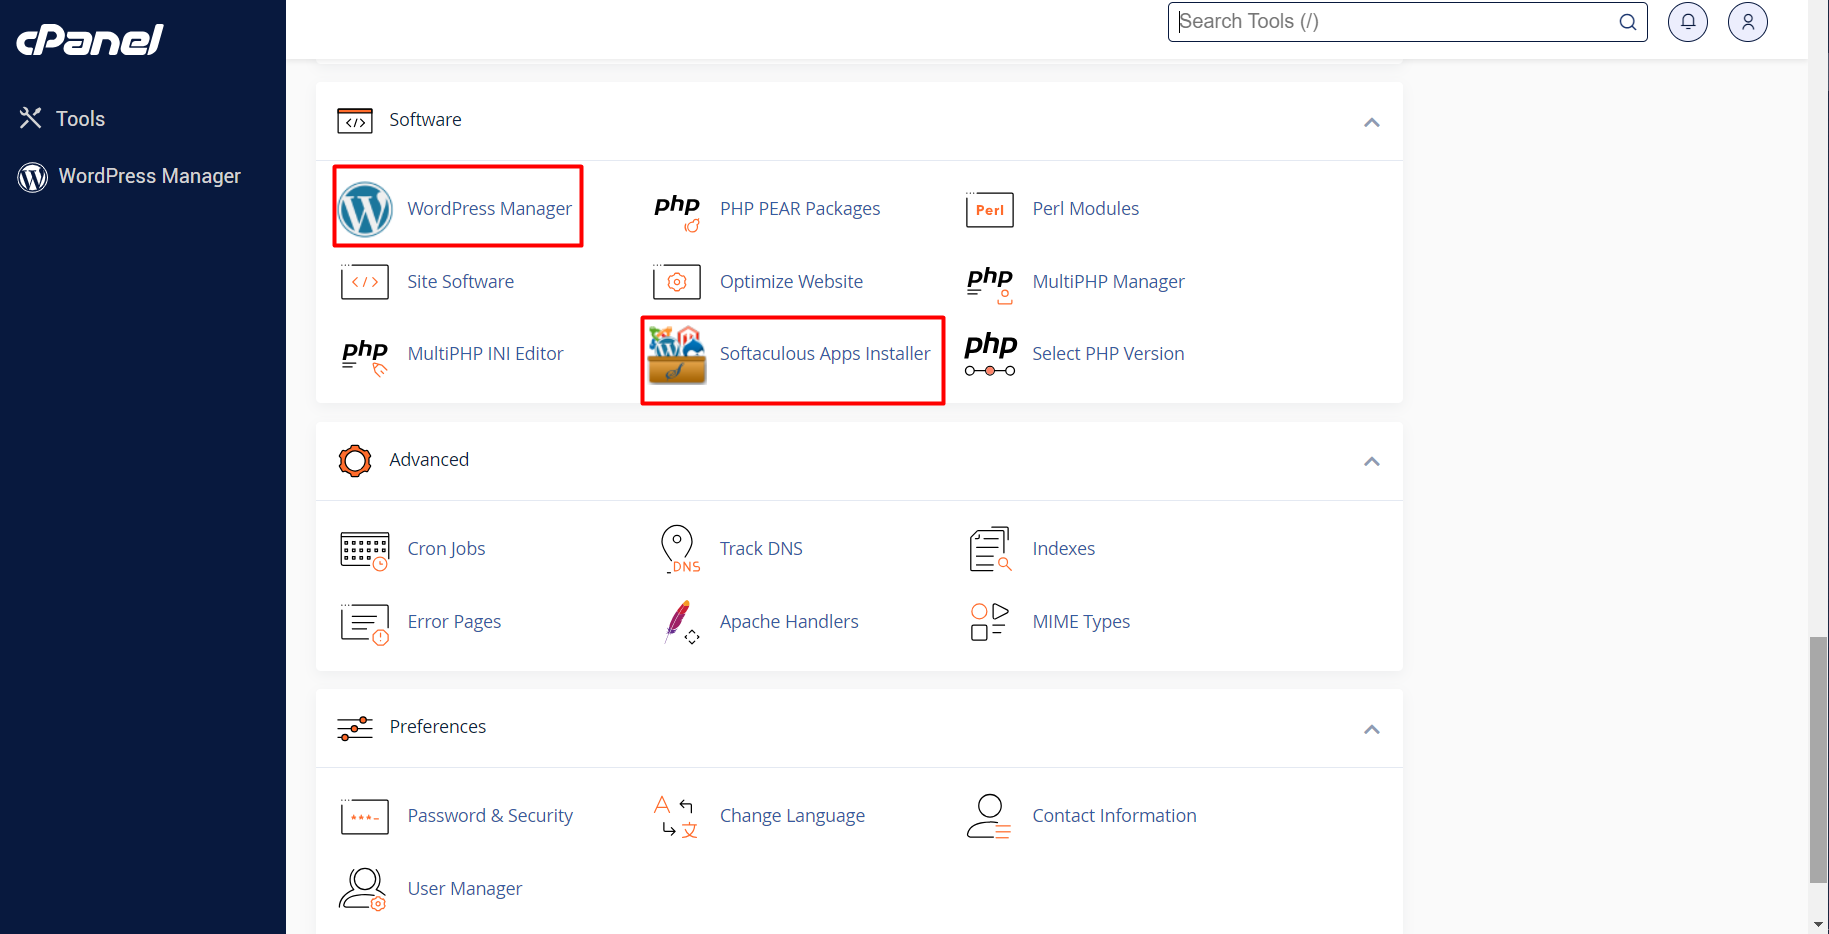
Step 2: There will be a WordPress Section, click the installation button to install WordPress on your website.

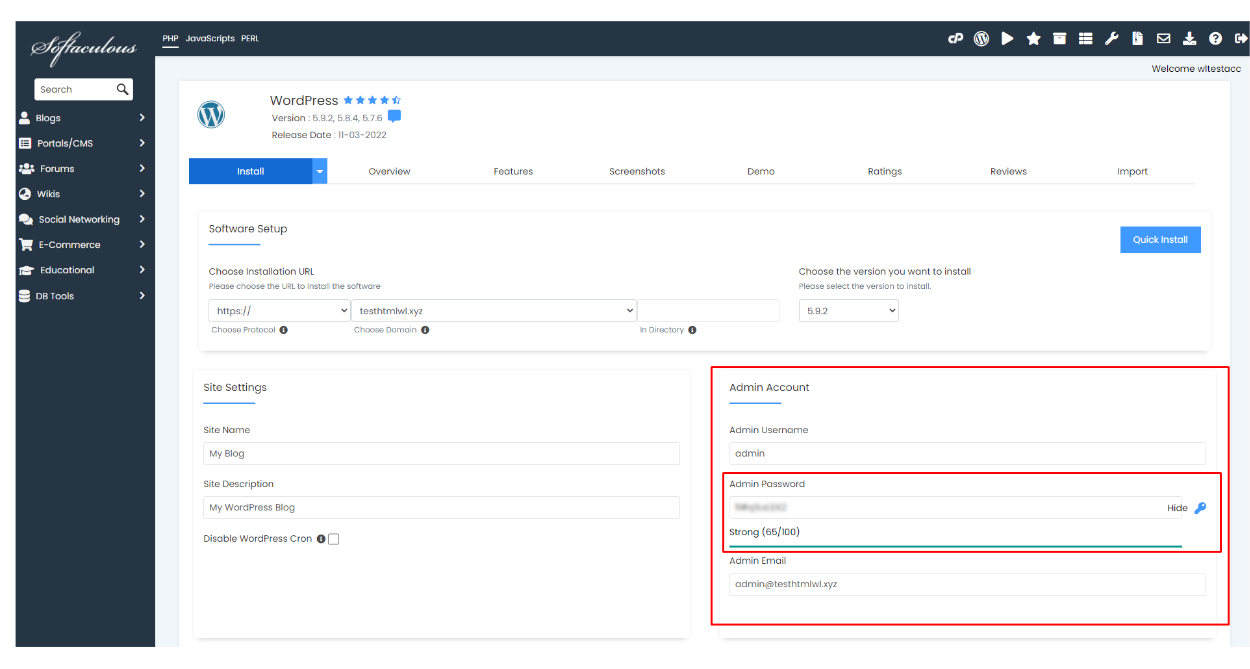
Step 3: After clicking the installation button, WordPress installation page will appear. You will be able to add Username, Password, choose theme, plugins & Edit your administrator email in one place.
Note: Make sure the directory button is empty.
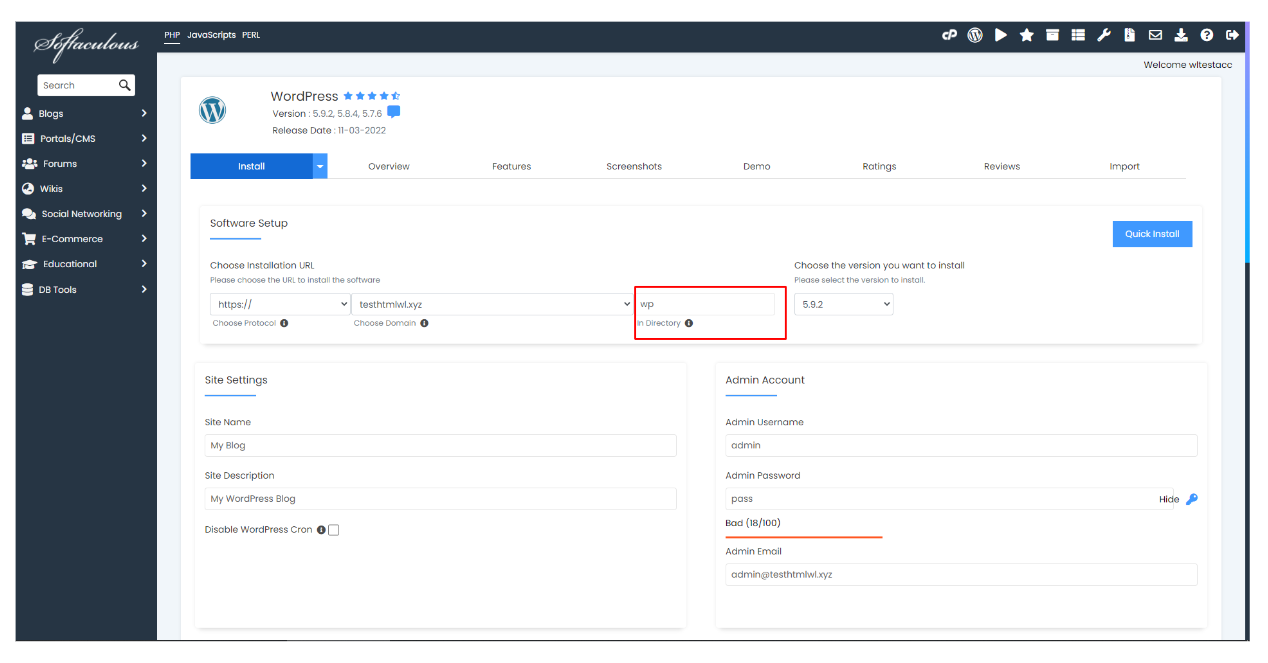
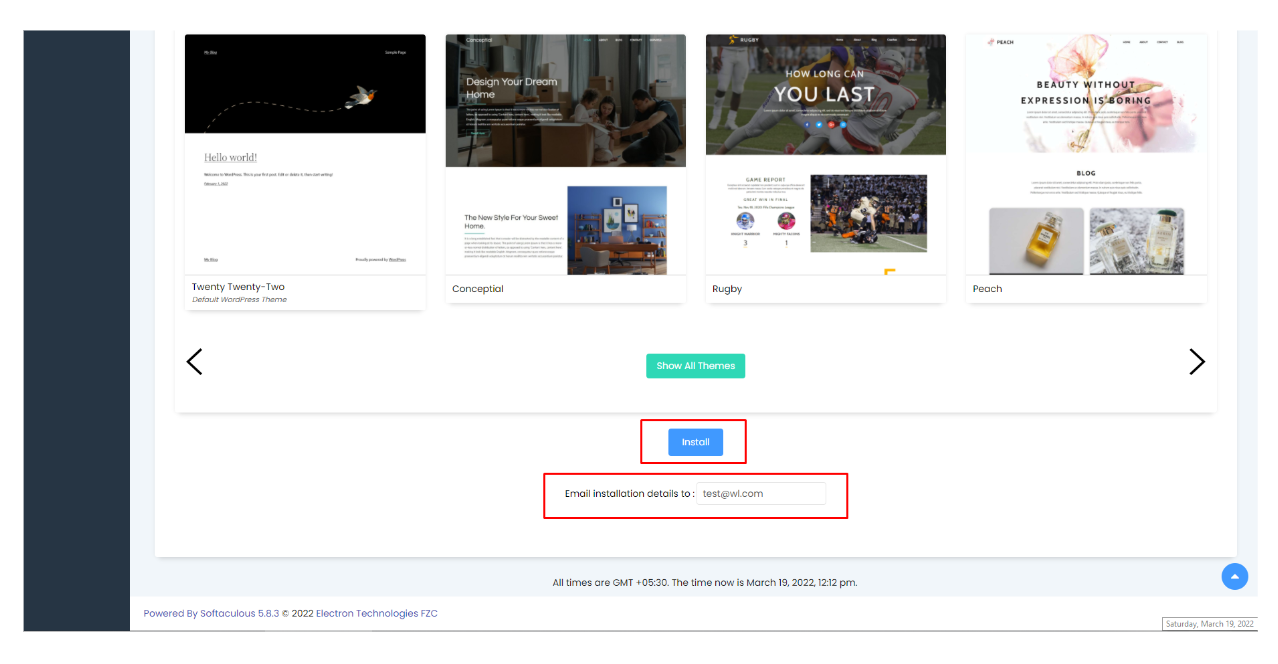
Step 4: Once all information added like (Username, Password & Admin Email) Scroll down to enter your email to receive installation details & Click Install to install WordPress.
Note: We highly recommend using strong passwords for your site security.
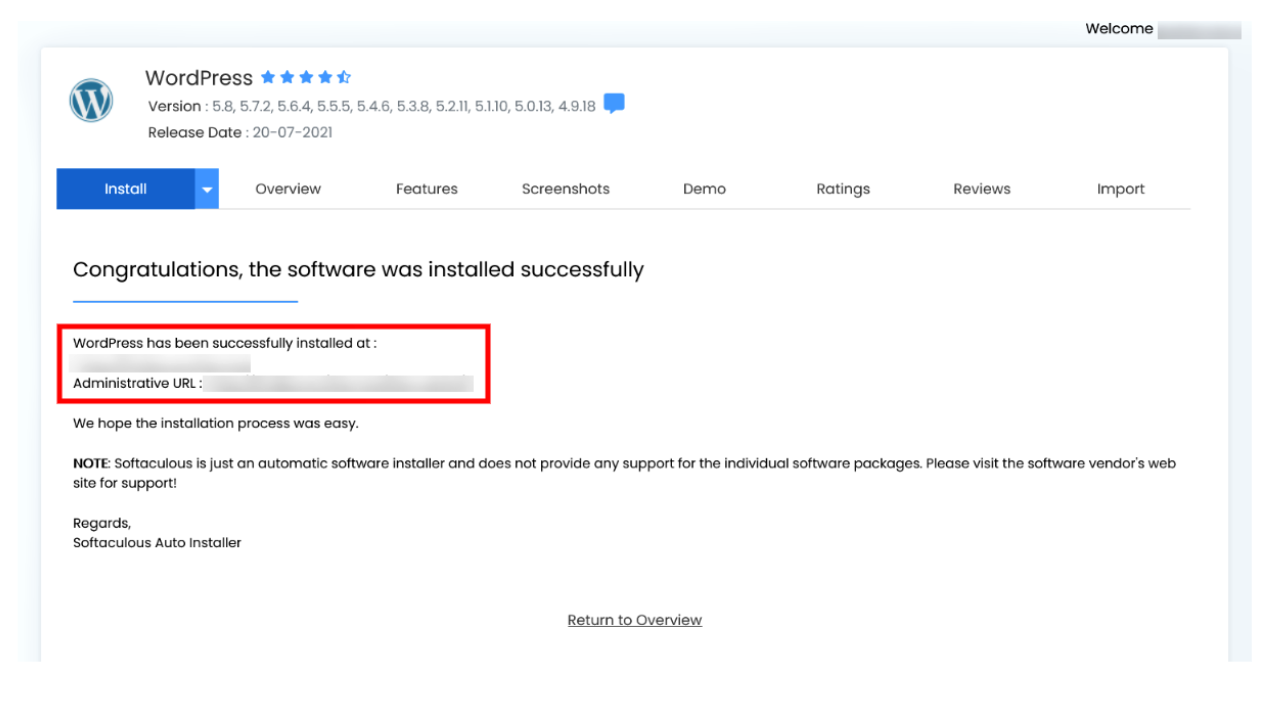
Step 5: Congratulations WordPress is successfully installed.
