

Before starting, Create the webmail from Webspacekit using the below link
https://my.webspacekit.com/knowledgebase/16/How-to-create-a-business-email.html
To set up Webmail to Gmail, you need to set up your domain’s email address in your Gmail account, as explained in the below steps.
Step 01 - Login to your Gmail Account
First, Login to your Gmail account, in which you want to set up your webmail to receive webmail emails.
Step 02 - Open Gmail Setting Tab
Click the setting icon in the top right corner of the Gmail, and then click “see all settings” in the drop-down to open the setting tab.

Step 03 - Navigate to the “Accounts and Import” tab.
Navigate to the “Accounts and Import” tab and click the Add Mail Account.
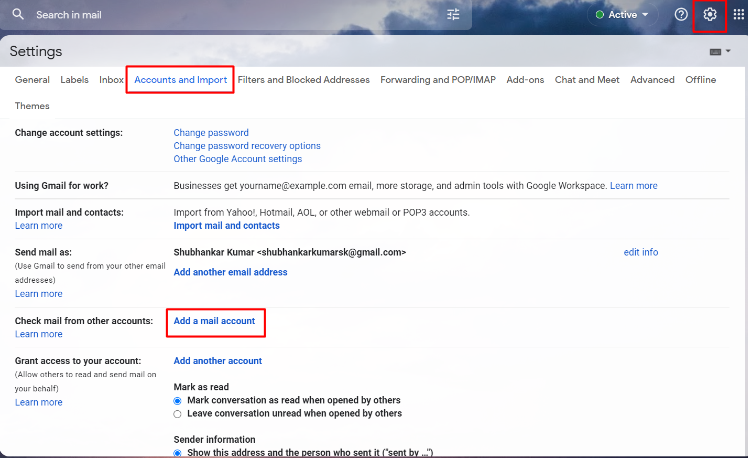
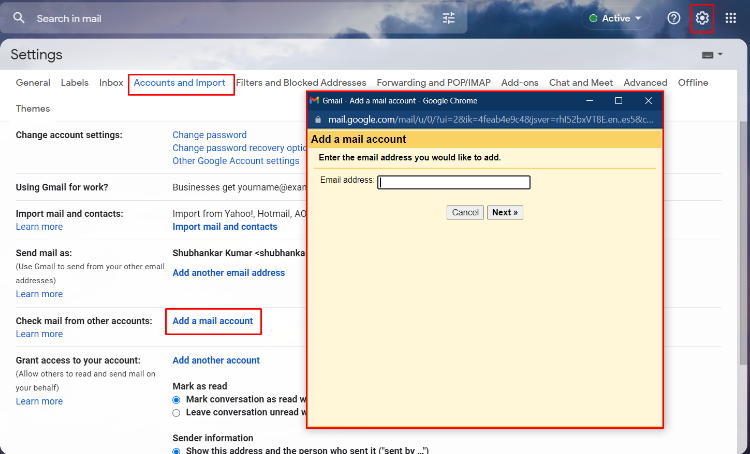
Step 04 - Add a mail account
Click on the “Add a mail account” section. You will be displayed in a new window that will require you to add your email address. Enter your email address ending with your domain name in the text field shown below in this window and click on the Next button.
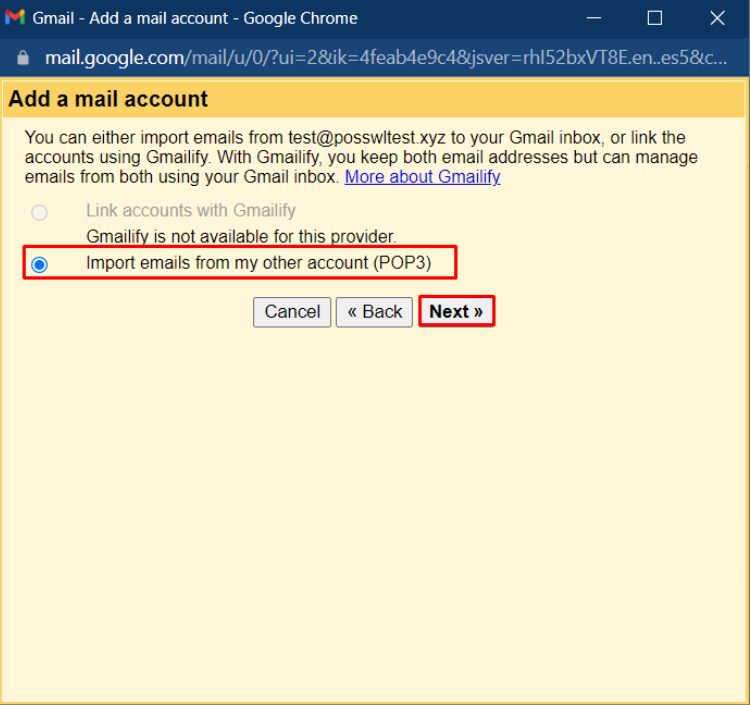
Step 5: Import email from POP3
You will be able to see two options below in the picture. Check the 2nd option “Import emails from my other account (POP3) and click on the Next button.
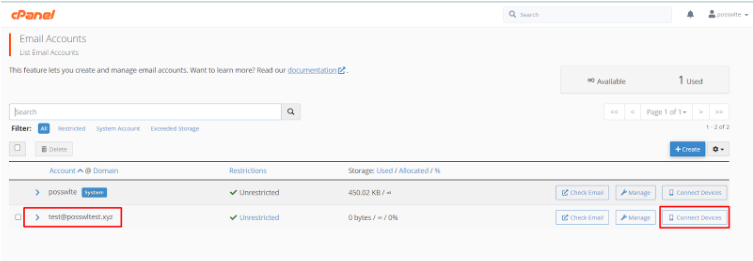
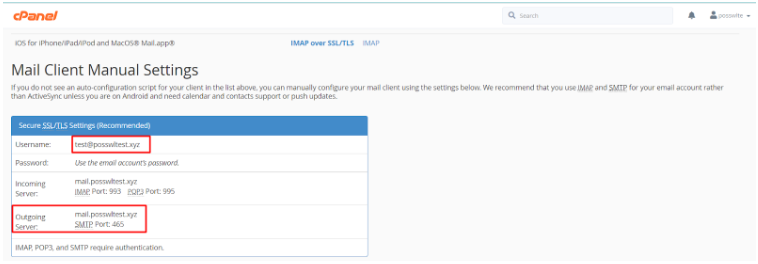
Step 6: Enter your email account configuration details from cPanel.
To retrieve the email account configuration details, click the EMAIL ACCOUNTS in cPanel of Webspacekit.

And choose your email account and click on Connected Devices.
Enter the details as per the account configuration details.
Write the complete email address password and confirm the POP server address. For non-secure connections, keep the port number 110 or choose 995 if your connection is secure. Check the box “Always use a secure connection (SSL) when retrieving mail.” and click on the “Add Account” button as shown in the screenshot.
Step 7: Email Account Connected.
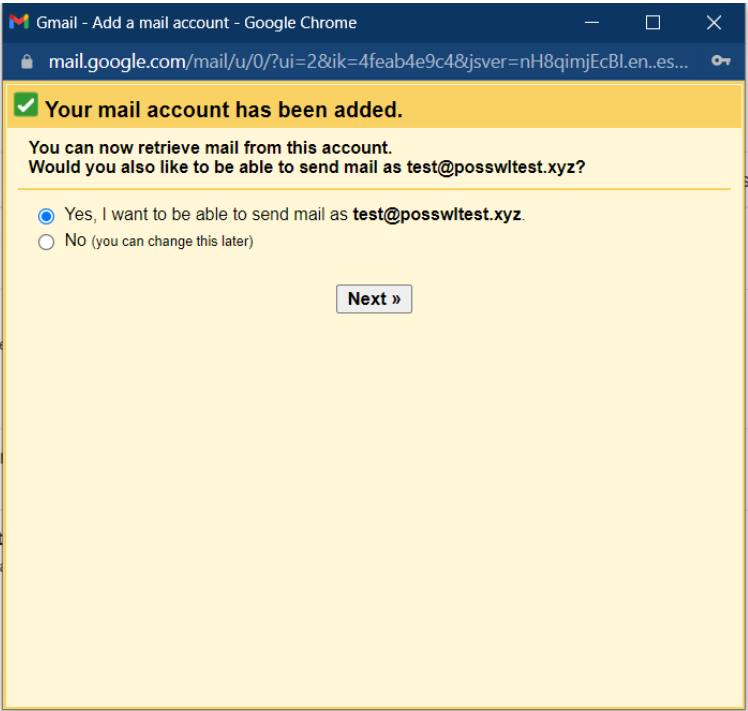
Choose the option “Yes, I want to be able to send mail as [email protected]” and click on the “Next Step”.
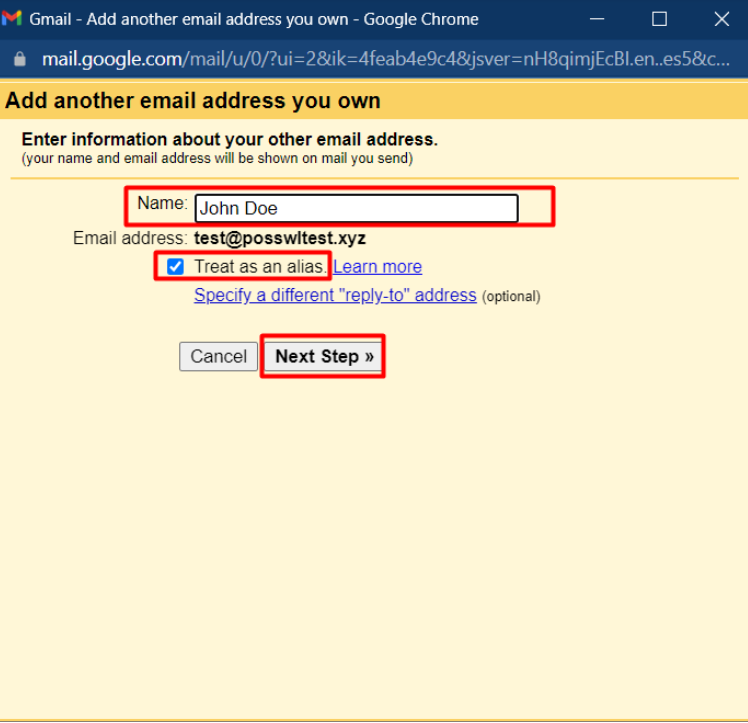
Add Your Name and Choose Treat as an alias.
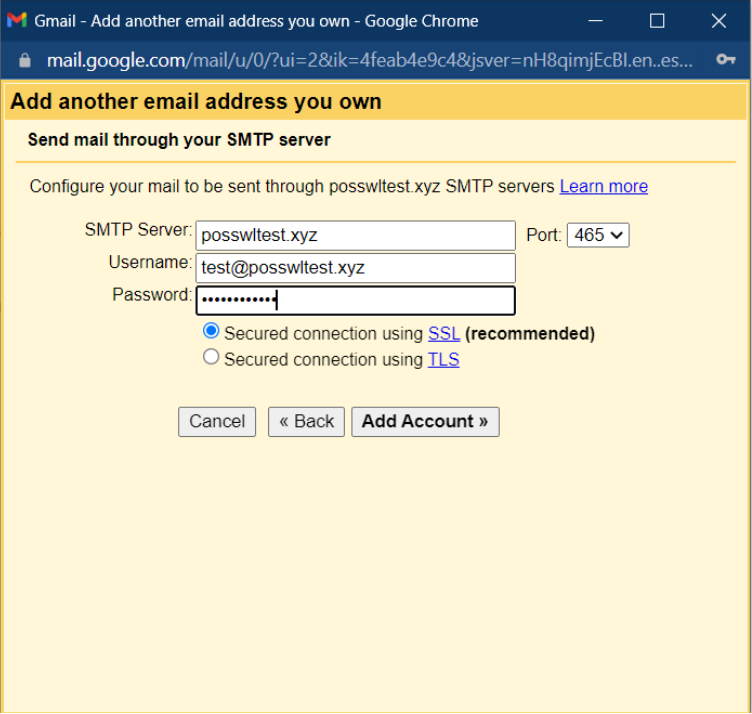
Enter the SMTP Details as per the EMAIL Configuration in cPanel.
Select Port 25 for Non-SSL or 465 for SSL and click on the “Add Account” button.
Step 8: Enter the Verification Code sent to your Webmail.
Enter the verification code sent to your webmail to connect your Gmail
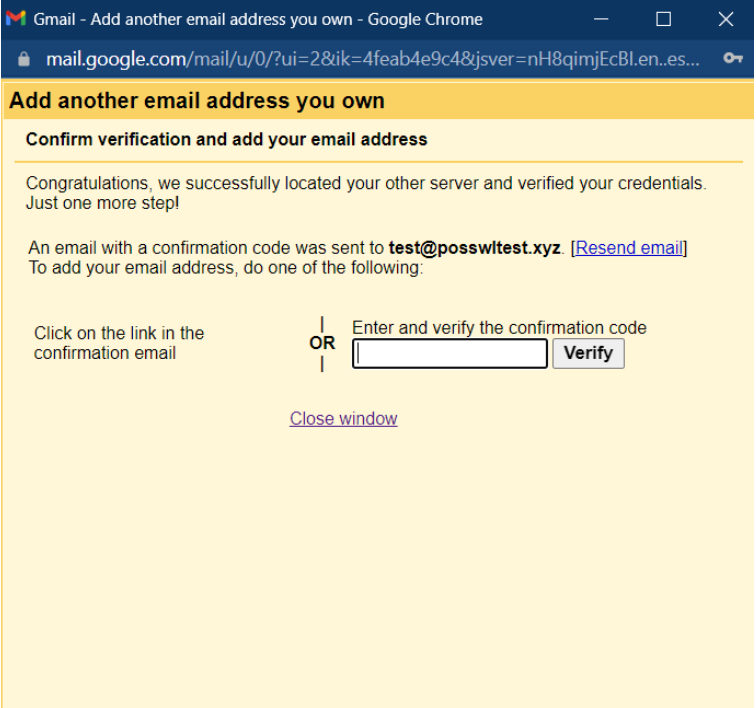
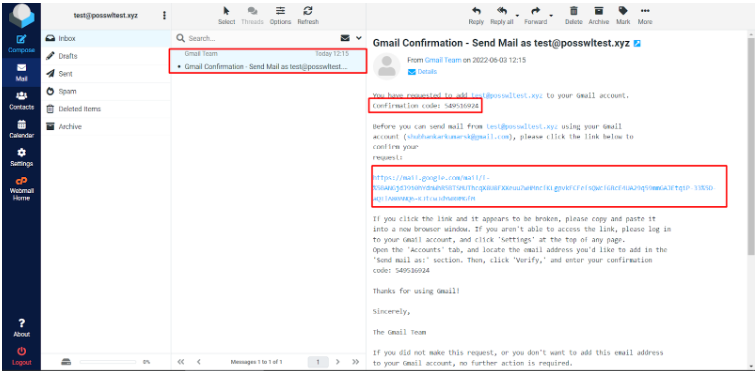
You will be able to enter the Verification Code received in the mail Or click on the verification link to connect your webmail to Gmail. Refer to the below screenshot. And Click Verifiy.
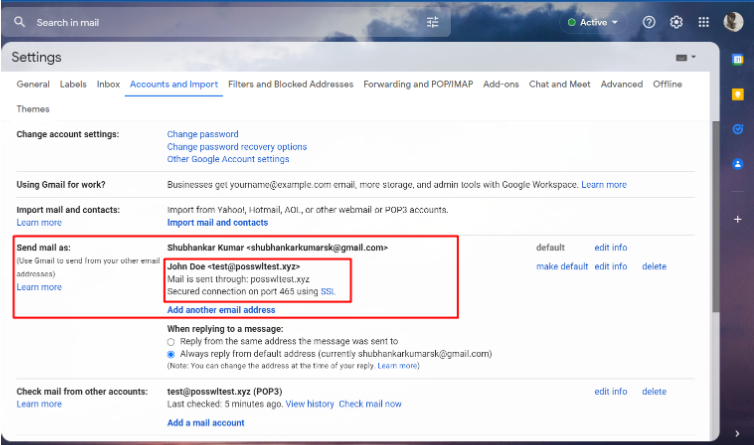
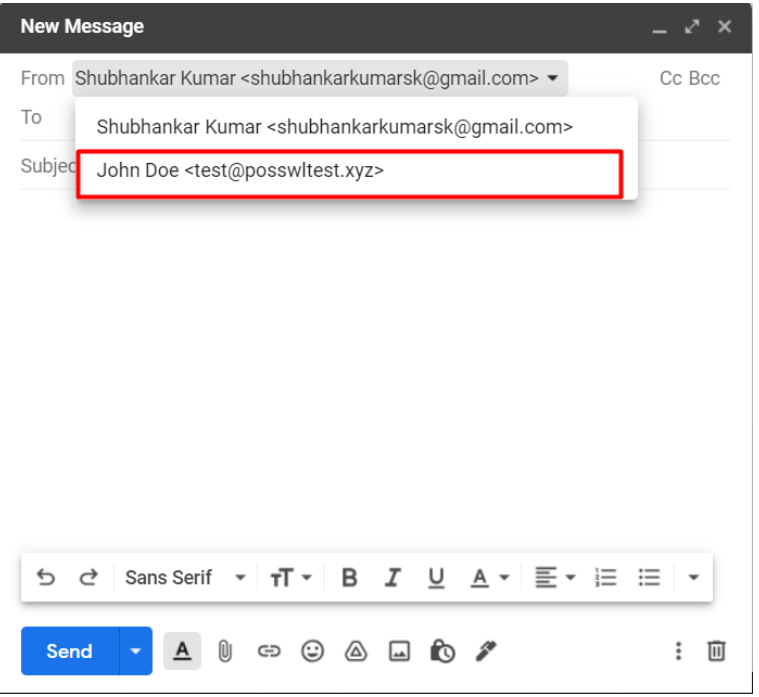
Finally, you will see your domain’s email address ([email protected]) in the send mail and the Check mail from other accounts sections.
Webmail Added successfully.
Congratulations! You have completed the process of Webmail to Gmail configuration.


