

How to increase PHP memory limit using webspacekit
PHP allocates a certain amount of memory when executing your PHP scripts. Your PHP script will exit and throws a fatal error if it has exhausted all the allocated memory.
Limiting memory allocation prevents PHP from consuming too much memory from the system. However, you can configure PHP to increase the memory limit if your script or application requires more memory for execution.
You can configure memory_limit option for PHP from WebSpaceKit Hosting Via C-Panel.
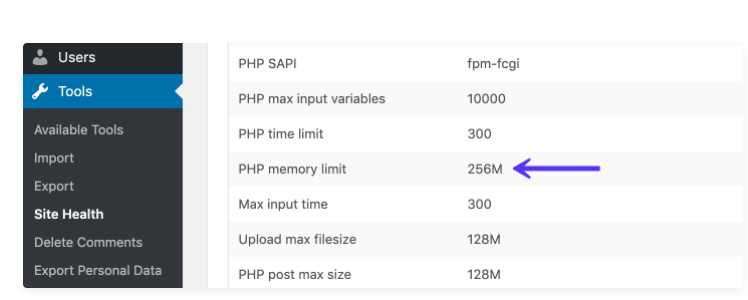
How to Check Your Current PHP Memory Limit:
In your WordPress dashboard, go to “Tools” → “Site Health” → “Info” and scroll down to the server section. Here you can see that the PHP memory limit is on your server. If the amount is low, say 32M, there’s ultimately only one fix for this issue: you need to increase the amount of memory allocated to your site. However, there are a few different ways to approach this.
Steps to change memory limit for PHP from WebSpaceKit Hosting Via C-Panel.
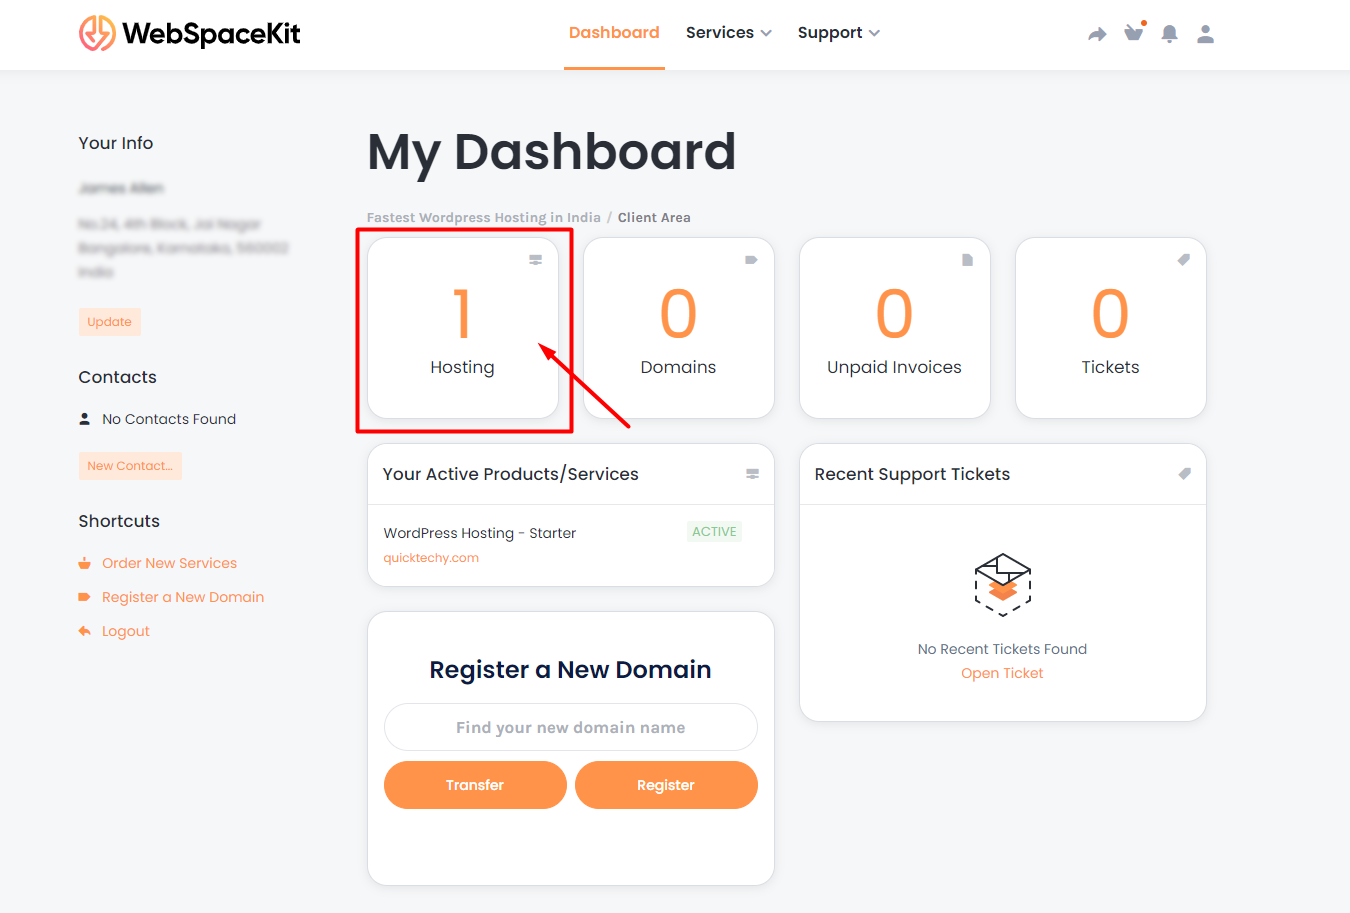
- Login into your WebSpaceKit Dashboard & Click Hosting
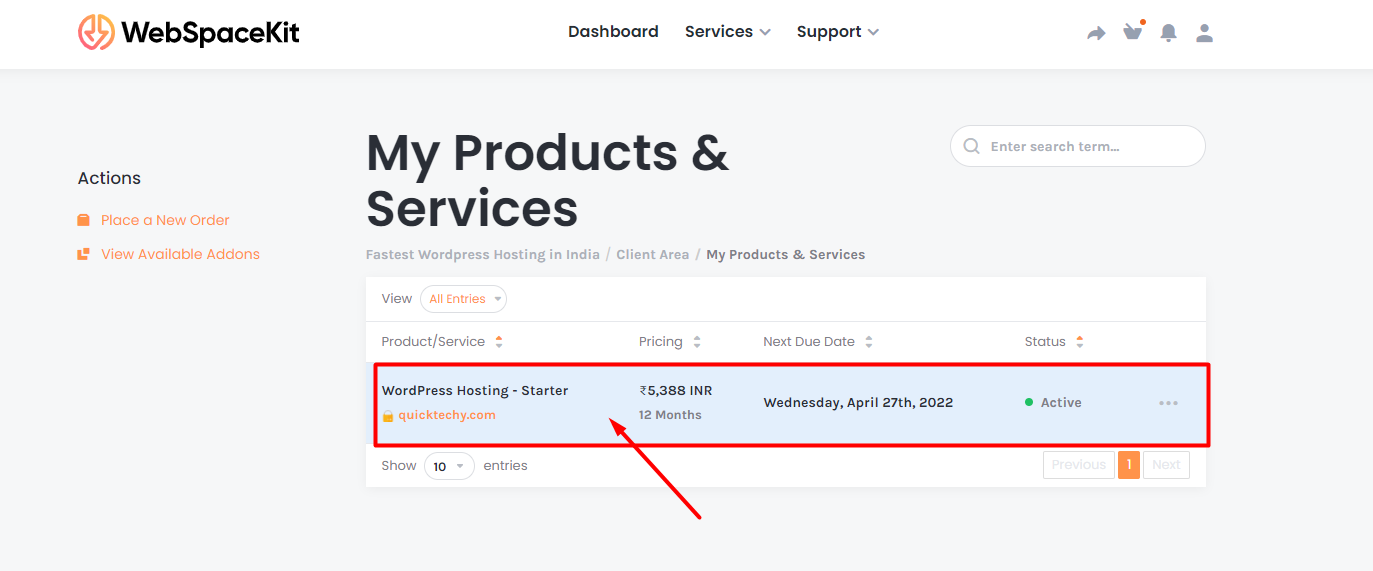
2. Click on your hosting account
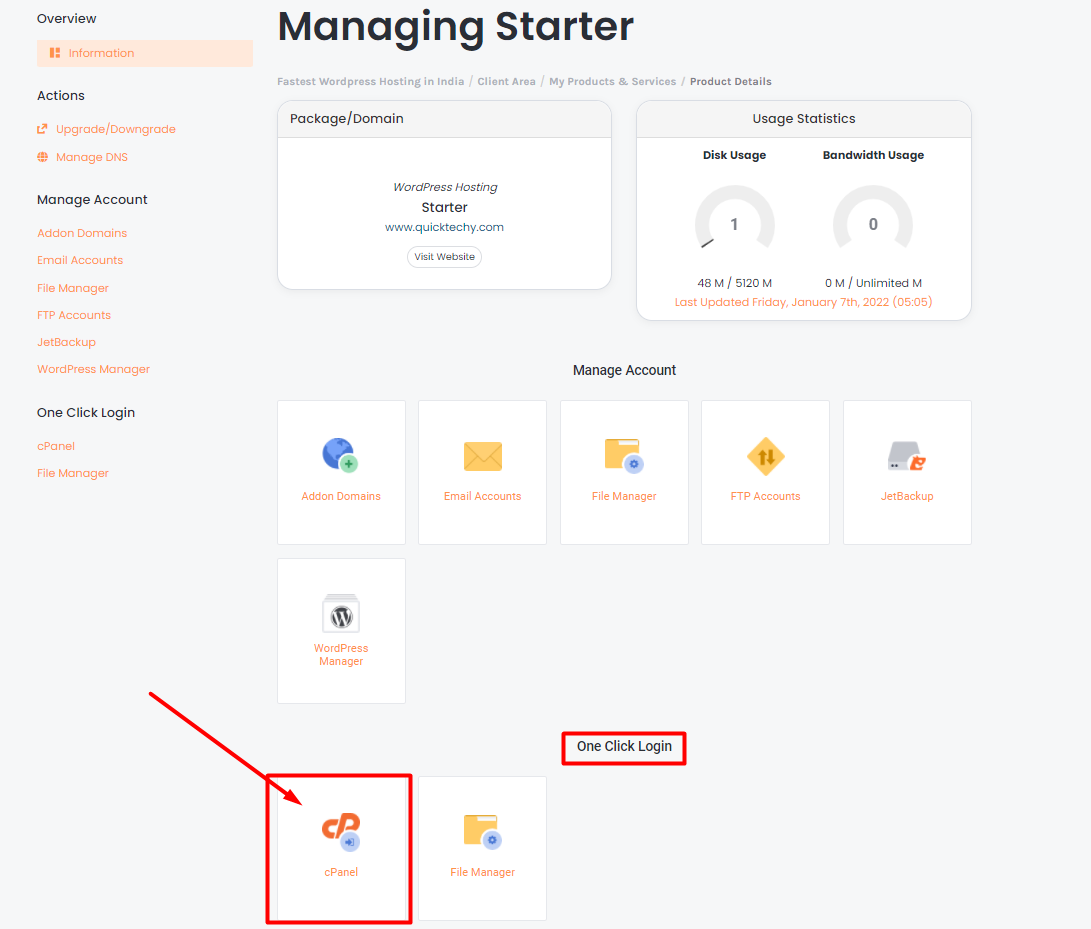
3.Login to C-Panel via One Click Login option
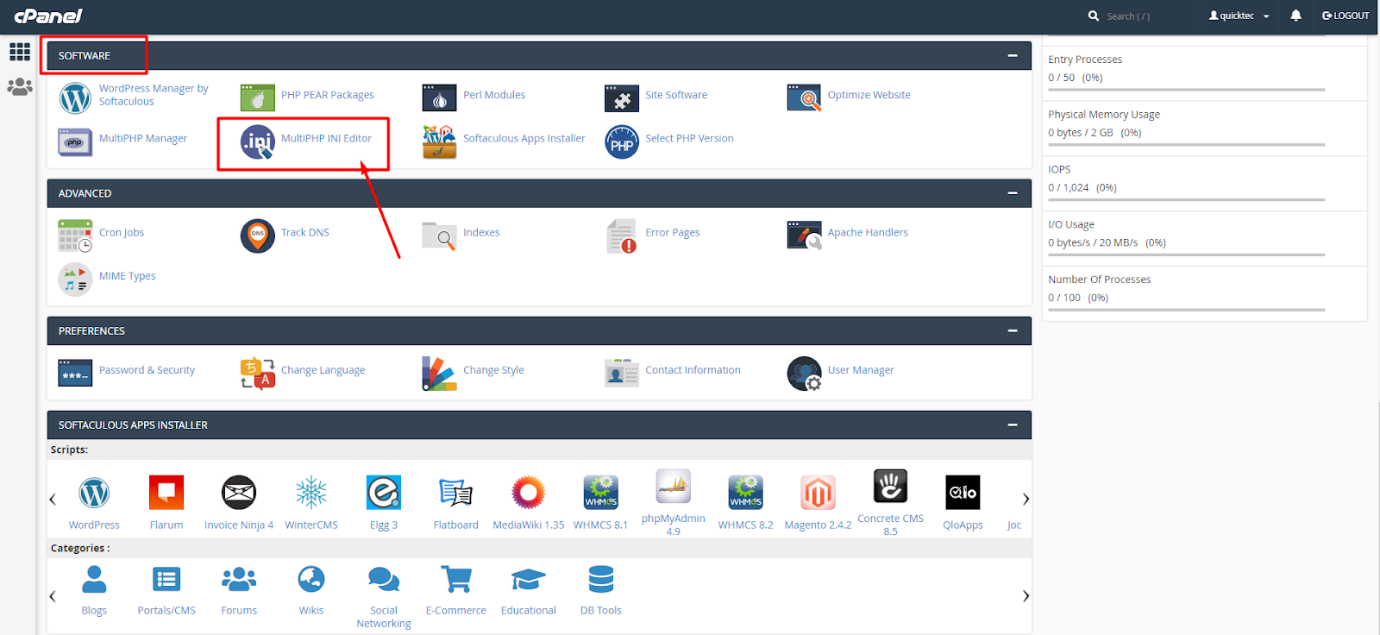
4. Once Logged into cPanel. Scroll down to Software - Multi INI Editor
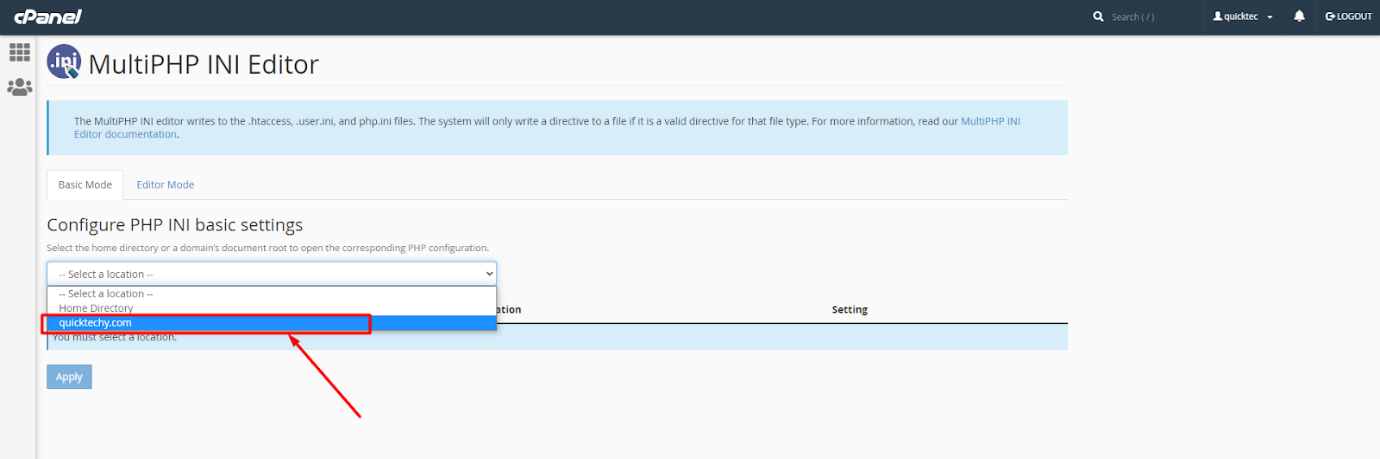
5. Select your domain name from Select location.
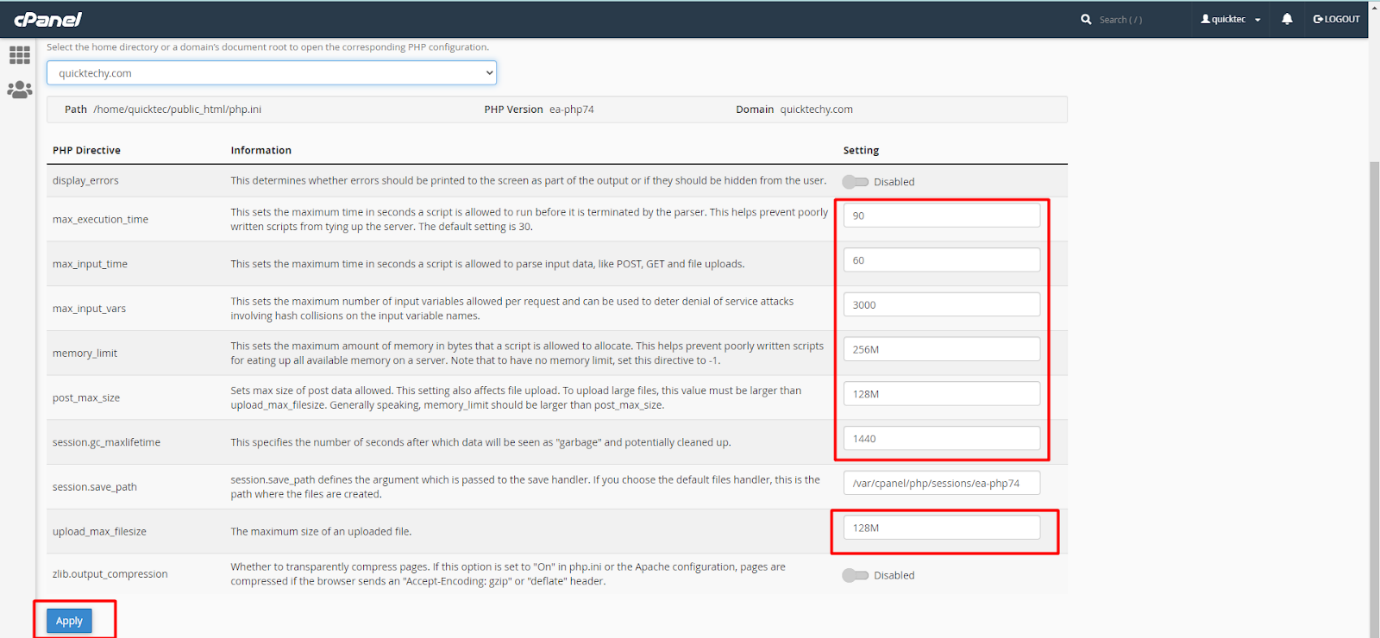
6. Change or update your required setting and click Apply. Bonus Tip - Change the Max File Size to Upload larger file into your WordPress.
These are the steps to increase PHP memory limit using WebSpaceKit.


