How to Create and Maintain MySQL Databases in cPanel
In this article, we will guide you through the process of creating a MySQL database and user, as well as assigning privileges in cPanel.
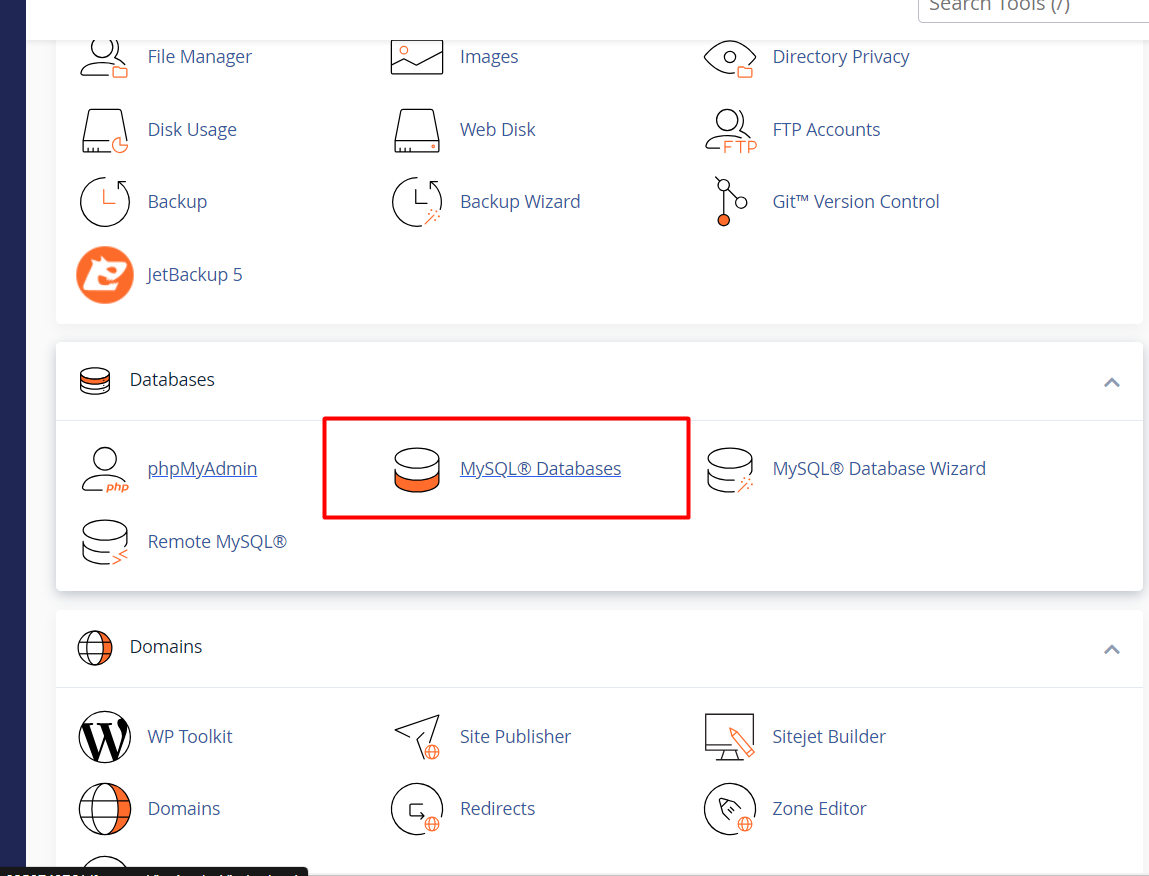
Step 1: Accessing the MySQL Databases menu
- Log in to your cPanel account.
- Find the Databases section and click on the MySQL Databases menu.
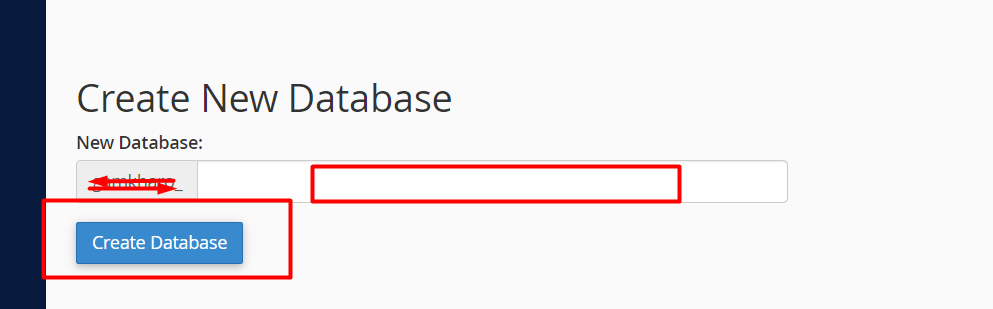
Step 2: Creating a MySQL Database
- In the MySQL Databases menu, find the "Create New Database" section.
- Enter a name for your database in the provided field.
- Click the "Create Database" button to create the database.
Step 3: Creating a MySQL User
- In the MySQL Databases menu, find the "MySQL Users" section.
- Click on "Add New User" to create a new MySQL user.
- Choose a username for your MySQL user.
- Generate a secure password using the built-in Password Generator or set your own strong password.
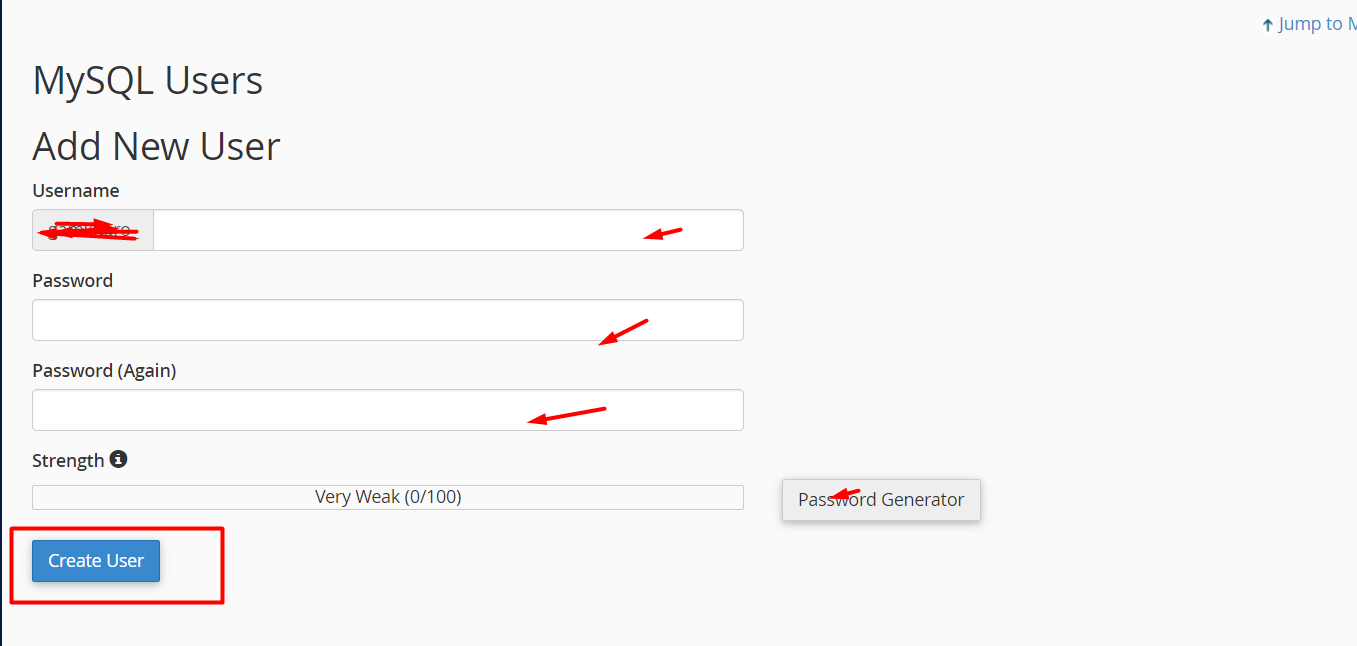
5. Click the "Create User" button to create the MySQL user.
Note:- Make a note of the password for future reference.
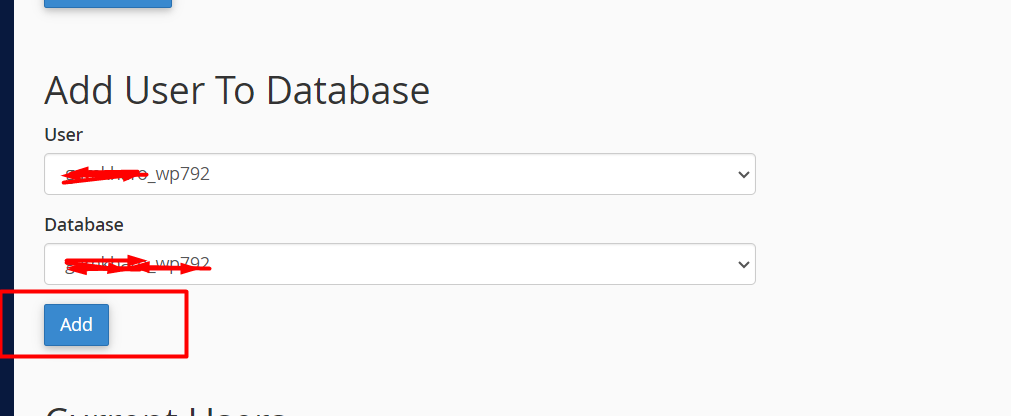
Step 4: Assigning the MySQL User to the Database
- In the MySQL Databases menu, find the "Add User To Database" section.
- Select the appropriate database and user from the dropdown menus.
3. Click the "Add" button to assign the MySQL user to the database.
Step 5: Setting Privileges for the MySQL User
- After assigning the user to the database, you will be redirected to the "Manage User Privileges" page.
- To grant all privileges to the MySQL user, select the "All Privileges" option.
- Click the "Make Changes" button to save the privileges

Step 6: Confirmation and Verification
- Once the privileges are set, you will receive a confirmation message stating that the MySQL user was successfully added to the database.


