

Flush Your DNS
DNS clients and operating systems store DNS results in a cache to speed up subsequent requests to the same hostname. However, cached DNS results can sometimes become stale, which can cause problems when you try to access a website, preventing you from communicating with the host correctly. To fix this, you may need to clear the DNS cache on your computer.
Here are the steps to clear the DNS cache on various operating systems:
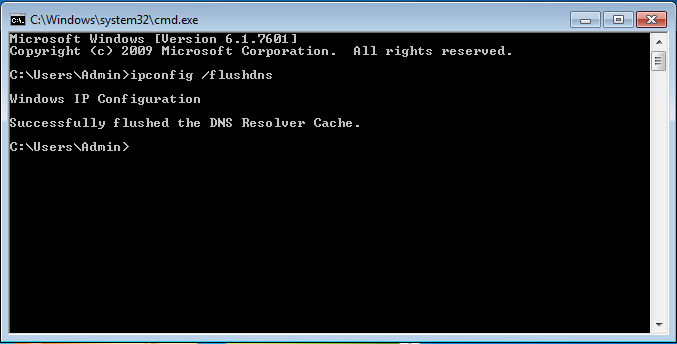
Windows:
- Click on the Start menu and type "cmd" in the search box.
- Right-click on "Command Prompt" and select "Run as administrator".
- In the Command Prompt, type "ipconfig /flushdns" and hit Enter.
- You will see a message confirming that the DNS cache has been cleared.
Linux:
- Open your terminal window.
- Type "/etc/rc.d/init.d/nscd restart" and hit Enter.
- You will see a message confirming that the DNS cache has been cleared.
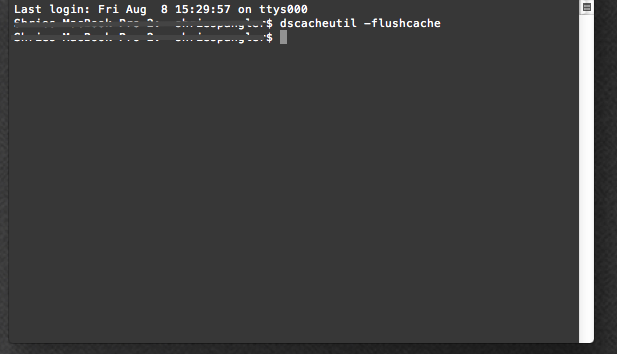
Mac OSX:
- Open the Terminal application.
- Type "dscacheutil -flushcache" and hit Enter.
- You will see a message confirming that the DNS cache has been cleared.
Mac OSX Leopard:
- Open the Terminal application.
- Type "dscacheutil -flushcache" and hit Enter.
- You will see a message confirming that the DNS cache has been cleared.
Mac OSX Yosemite:
- Open the Terminal application.
- To clear the MDNS cache, type "sudo discoveryutil mdnsflushcache" and hit Enter.
- Enter your admin password when requested.
- To clear the UDNS cache, type "sudo discoveryutil udnsflushcaches" and hit Enter.
- Enter your admin password when requested.
- You will see a message confirming that the DNS cache has been cleared.
By clearing your DNS cache, you can ensure that your computer is using the correct IP address for the domain you're trying to access.


